Demonstration Videos
Below are two lab demonstration videos for Physics 111 and two videos for Physics 112. The videos start with an overview of the apparatus, and then demonstrate the procedure step-by-step.
The videos have several intended audiences. Their immediate purpose was to supplement the clips the stockroom had already made for teaching labs remotely. They were also designed to give students previews of the labs and to document proper equipment setup and procedure for new instructors and stockroom staff.
Physics 111 - Motion
Physics 111 - Specific Heat & Heat of Fusion
Physics 112 - Traveling & Standing Waves
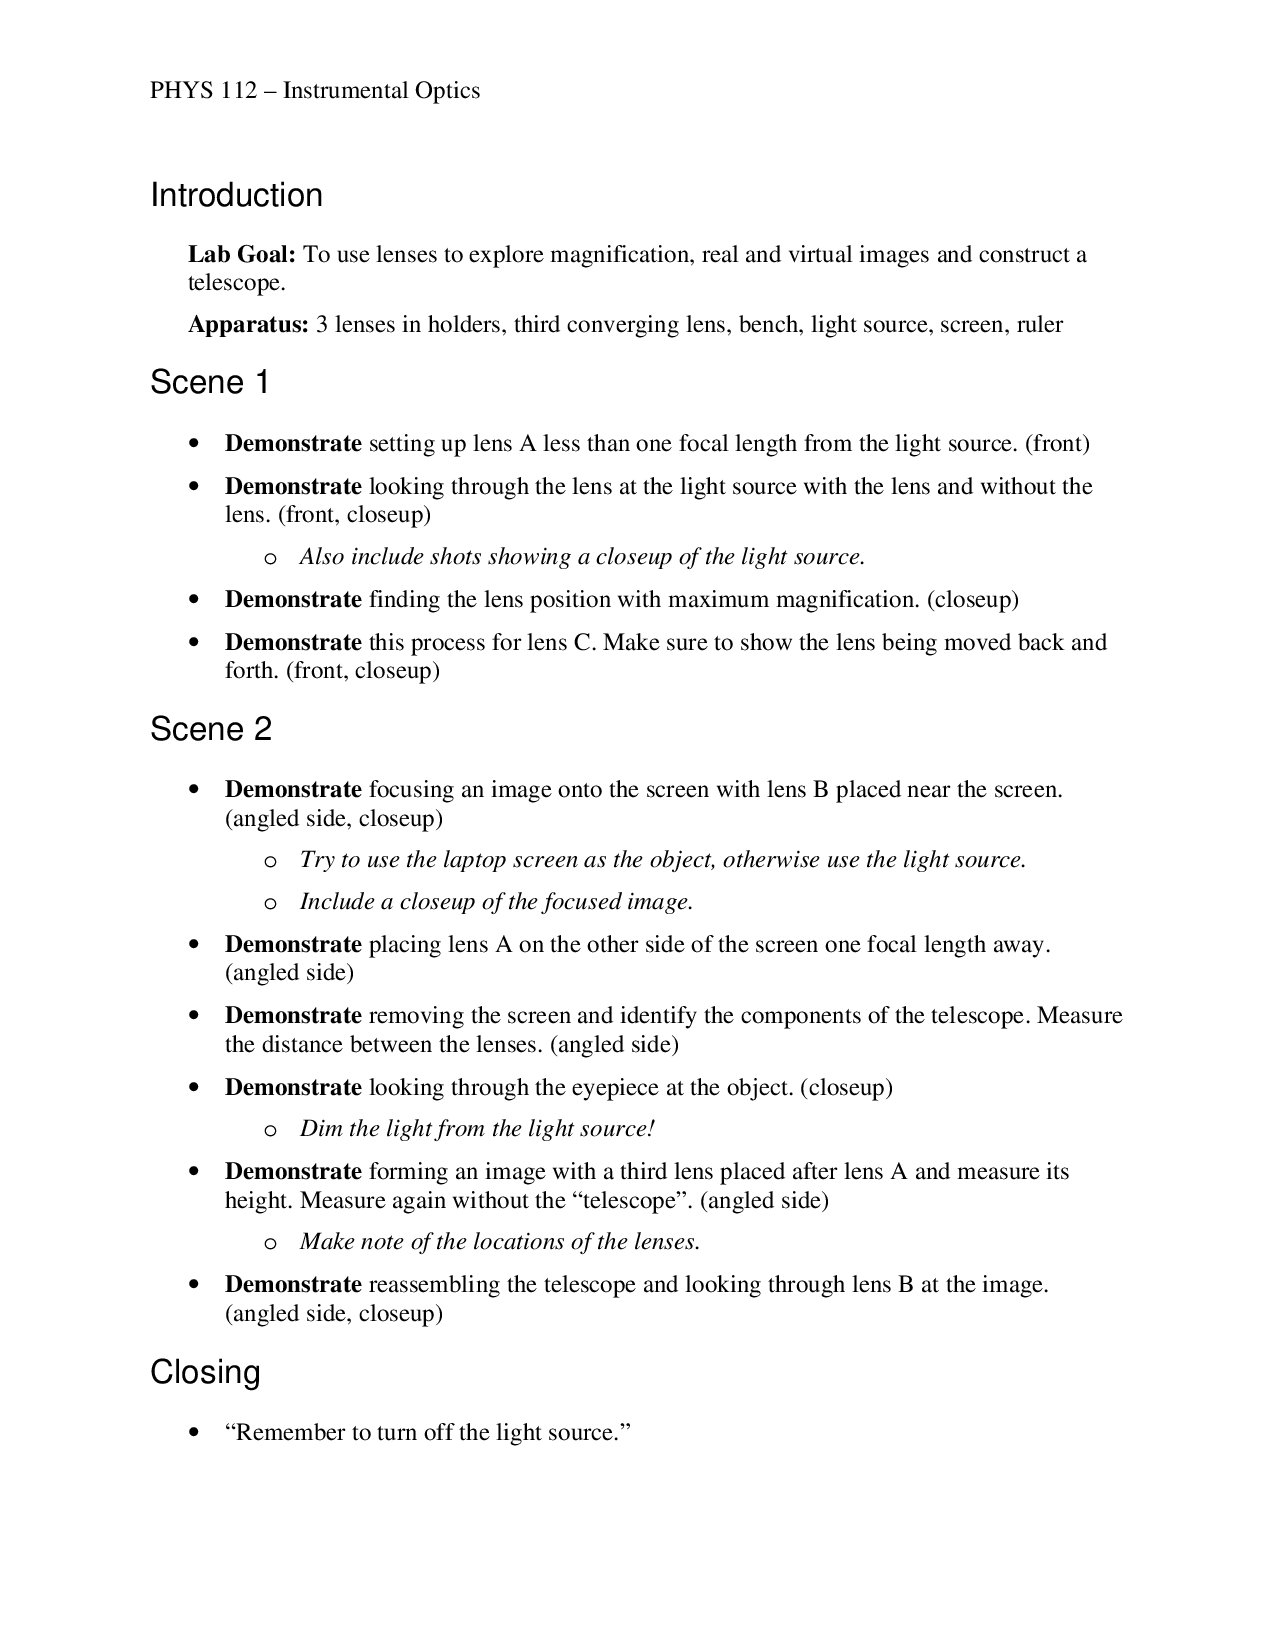
Physics 112 - Instrumental Optics
Development
While most of the videos were made during Spring of 2020, initial planning began the previous Fall. I tried filming a video using an old camcorder and editing it with Windows Movie Maker. Apart from the low resolution, I was satisfied with the result, but it was clear I wouldn't have time to make videos for all the labs that year.
Over the winter break, I coordinated with the stockroom to upgrade from the camcorder to a GoPro and switched from Windows Movie Maker to Shotcut after some research. During this time I also completed filming for some of the early labs and got two of them edited with Shotcut.
It was clear it would still be difficult to get everything done on my own, so I trained two of my coworkers in the stockroom to assist with the editing process, Matthew Abramson and Prasanna Jayanthi. Each of them took over editing responsibilities for one of the two courses based on their experience teaching labs. With their help the workload became manageable and we were able to get all the videos completed on schedule so all the lab sections that semester could benefit from the new videos.
Filming & Editing Process
Two labs were filmed and edited each week. I set up the schedule so that I would film two weeks ahead of the date the lab would take place. This gave my coworkers at least a week to finish their editing and then get back to me for the final revision. We used the project management tool Asana so everyone could see status updates online. It would have been easier to meet in person, but the ongoing pandemic encouraged us to find ways to coordinate remotely.
I did the filming for both labs on the same day using an outline. The structure of the outlines changed slightly through the semester, but the basic format stayed the same. The outline started with a statement of the lab goal and an apparatus list. I would then make an early attempt to break the video into different scenes and finish off with some closing notes. The bolded keyword "Demonstrate" was used to indicate thing which needs to be shown to the camera, while italicized text were notes for me and text in quotes was meant to be said out loud. Suggested camera angles were included in parentheses.
While filming the video I made notes on a printout of the outline. These notes were meant to help my coworkers with the editing process, as I usually made some changes during the filming process.

After filming, I uploaded the video files, an image of my written notes, and any other files such as voiceover audio to Google Drive. I set a convention for the folder structure and file names to ensure the edit files from Shotcut would be easy to exchange back and forth. My coworkers would then download the files and assemble the video edit. Once they were done they uploaded their edit and then I downloaded and reviewed it.
I made sure to give them extra feedback early on to ensure we were on the same page. Most of the time the edit was fine as it was or just needed some minor tweaks. Occasionally there was a miscommunication and it didn't turn out like I expected. When this happened I either asked them to go over it again with better instructions, or I helped them more closely with the editing.
Once the review process was finished I exported the final video file and uploaded it to the stockroom's Panopto account.